
How to Attach Hair Extensions for a Flawless Look?
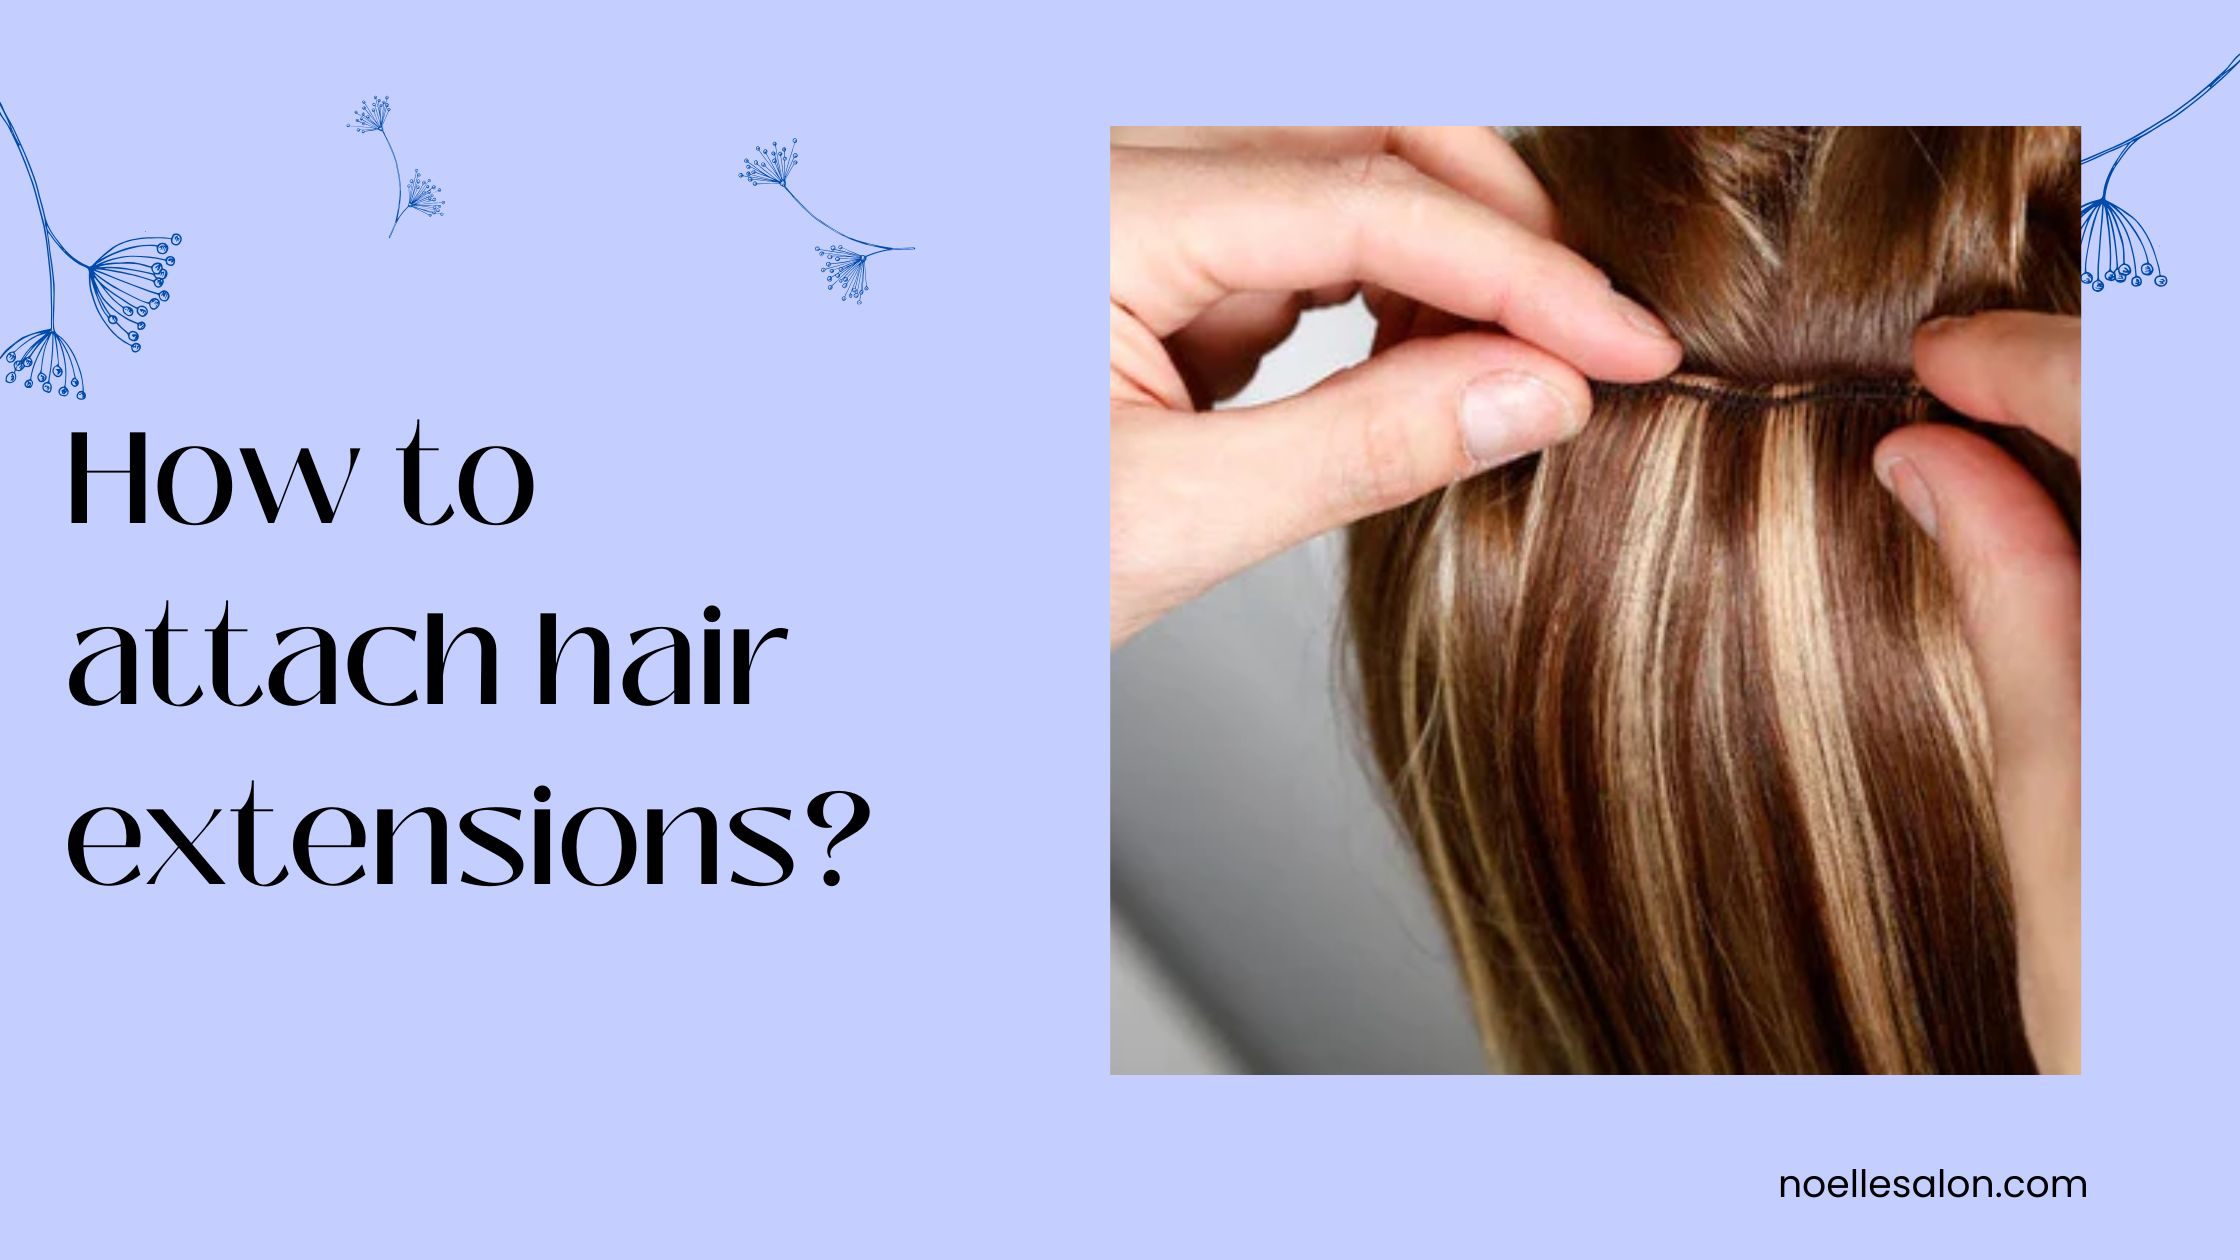
Dreaming of voluminous, longer, or more vibrant hair without the long wait? Hair extensions are your shortcut to stunning locks, but only if you know how to attach them correctly. If you’ve ever watched a professional stylist at work and wondered: How do they attach hair extensions so flawlessly, you’re not alone.
When applied the right way, extensions blend seamlessly into your natural hair, boosting your confidence and turning heads for all the right reasons. But if done poorly, they can lead to uneven texture, visible tracks, or discomfort.
In this guide, we’ll answer the key question: how do you attach hair extensions properly so you can achieve a flawless, natural-looking finish every time? But first, let us understand some basics.
How Do Hair Extensions Attach?
Hair extensions attach to your natural hair using various methods depending on your hair type, hair texture, extension type, and how long you want them to last. Temporary options like clip-in extensions use small, pressure-sensitive clips that snap onto sections of your hair.
Tape-in extensions use medical-grade adhesive tapes that sandwich a thin strip of your natural hair between two wefts. For longer-term solutions:
-
Sew-in extensions are stitched into tightly braided cornrows
-
Keratin bond (fusion) extensions are attached strand by strand using heat to melt and seal the bond
-
Micro-link (I-tip) extensions are secured using tiny silicone-lined beads clamped onto the rest of your hair.
Each method offers a different balance of longevity, styling flexibility, and maintenance. Let us understand how to attach each type of extension separately.
How to Attach Hair Extensions?
Not all extensions are created equal, and neither are their application techniques. Whether you want something temporary or a long-term transformation, here’s how to properly attach the five most popular types of hair extensions.
1. How to Attach Clip In Hair Extensions?
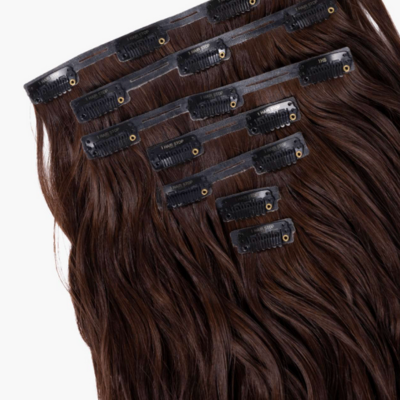 Here's a step-by-step process of attaching clip-in hair extensions:
What you’ll need:
-
A set of clip-in extensions
-
Rat-tail comb
-
Sectioning clips
-
Mirror
Steps:
-
Start with clean, dry, and detangled hair: Make sure your hair is dry and free of tangles. Use a light brush or wide-tooth comb to smooth it out.
-
Section your hair horizontally: Begin at the nape of your neck. Use a rat-tail comb to create a horizontal part and clip the top section up and away.
-
Attach the first weft: Open the clips on your first weft and secure it close to the roots of your parted section. Press down firmly to snap the clips shut.
-
Work your way upward: Create new sections an inch above the last one and continue adding wefts. Use longer wefts at the back and shorter ones around the sides for a balanced look.
-
Blend and style: After all the wefts are in place, gently brush through your hair to blend the extensions with your natural strands. Style with heat tools as desired, but use a heat protectant.
2. How to Attach Tape-In Hair Extensions?
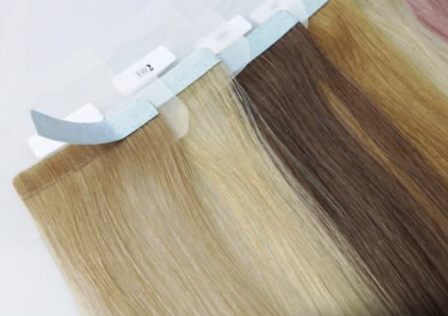 Here's a step-by-step process of attaching tape-in hair extensions:
What you’ll need:
-
Tape-in extension packs
-
Fine-tooth comb
-
Sectioning clips
-
Tail comb
-
Flat iron (optional)
Steps:
-
Wash your hair with a clarifying shampoo: This removes any oil or product that might weaken the adhesive.
-
Section your hair: Create a thin, clean horizontal part about an inch above the nape of your neck.
-
Place the bottom tape: Take a thin strip of your natural hair and press it onto the sticky side of one tape-in extension.
-
Seal with the top tape: Place another tape piece on top of the hair sandwich-style, and press firmly.
-
Repeat in layers: Work your way up in horizontal sections, spacing each sandwich appropriately.
-
Style as desired: Use a flat iron to blend, but avoid applying heat directly to the tape tabs.
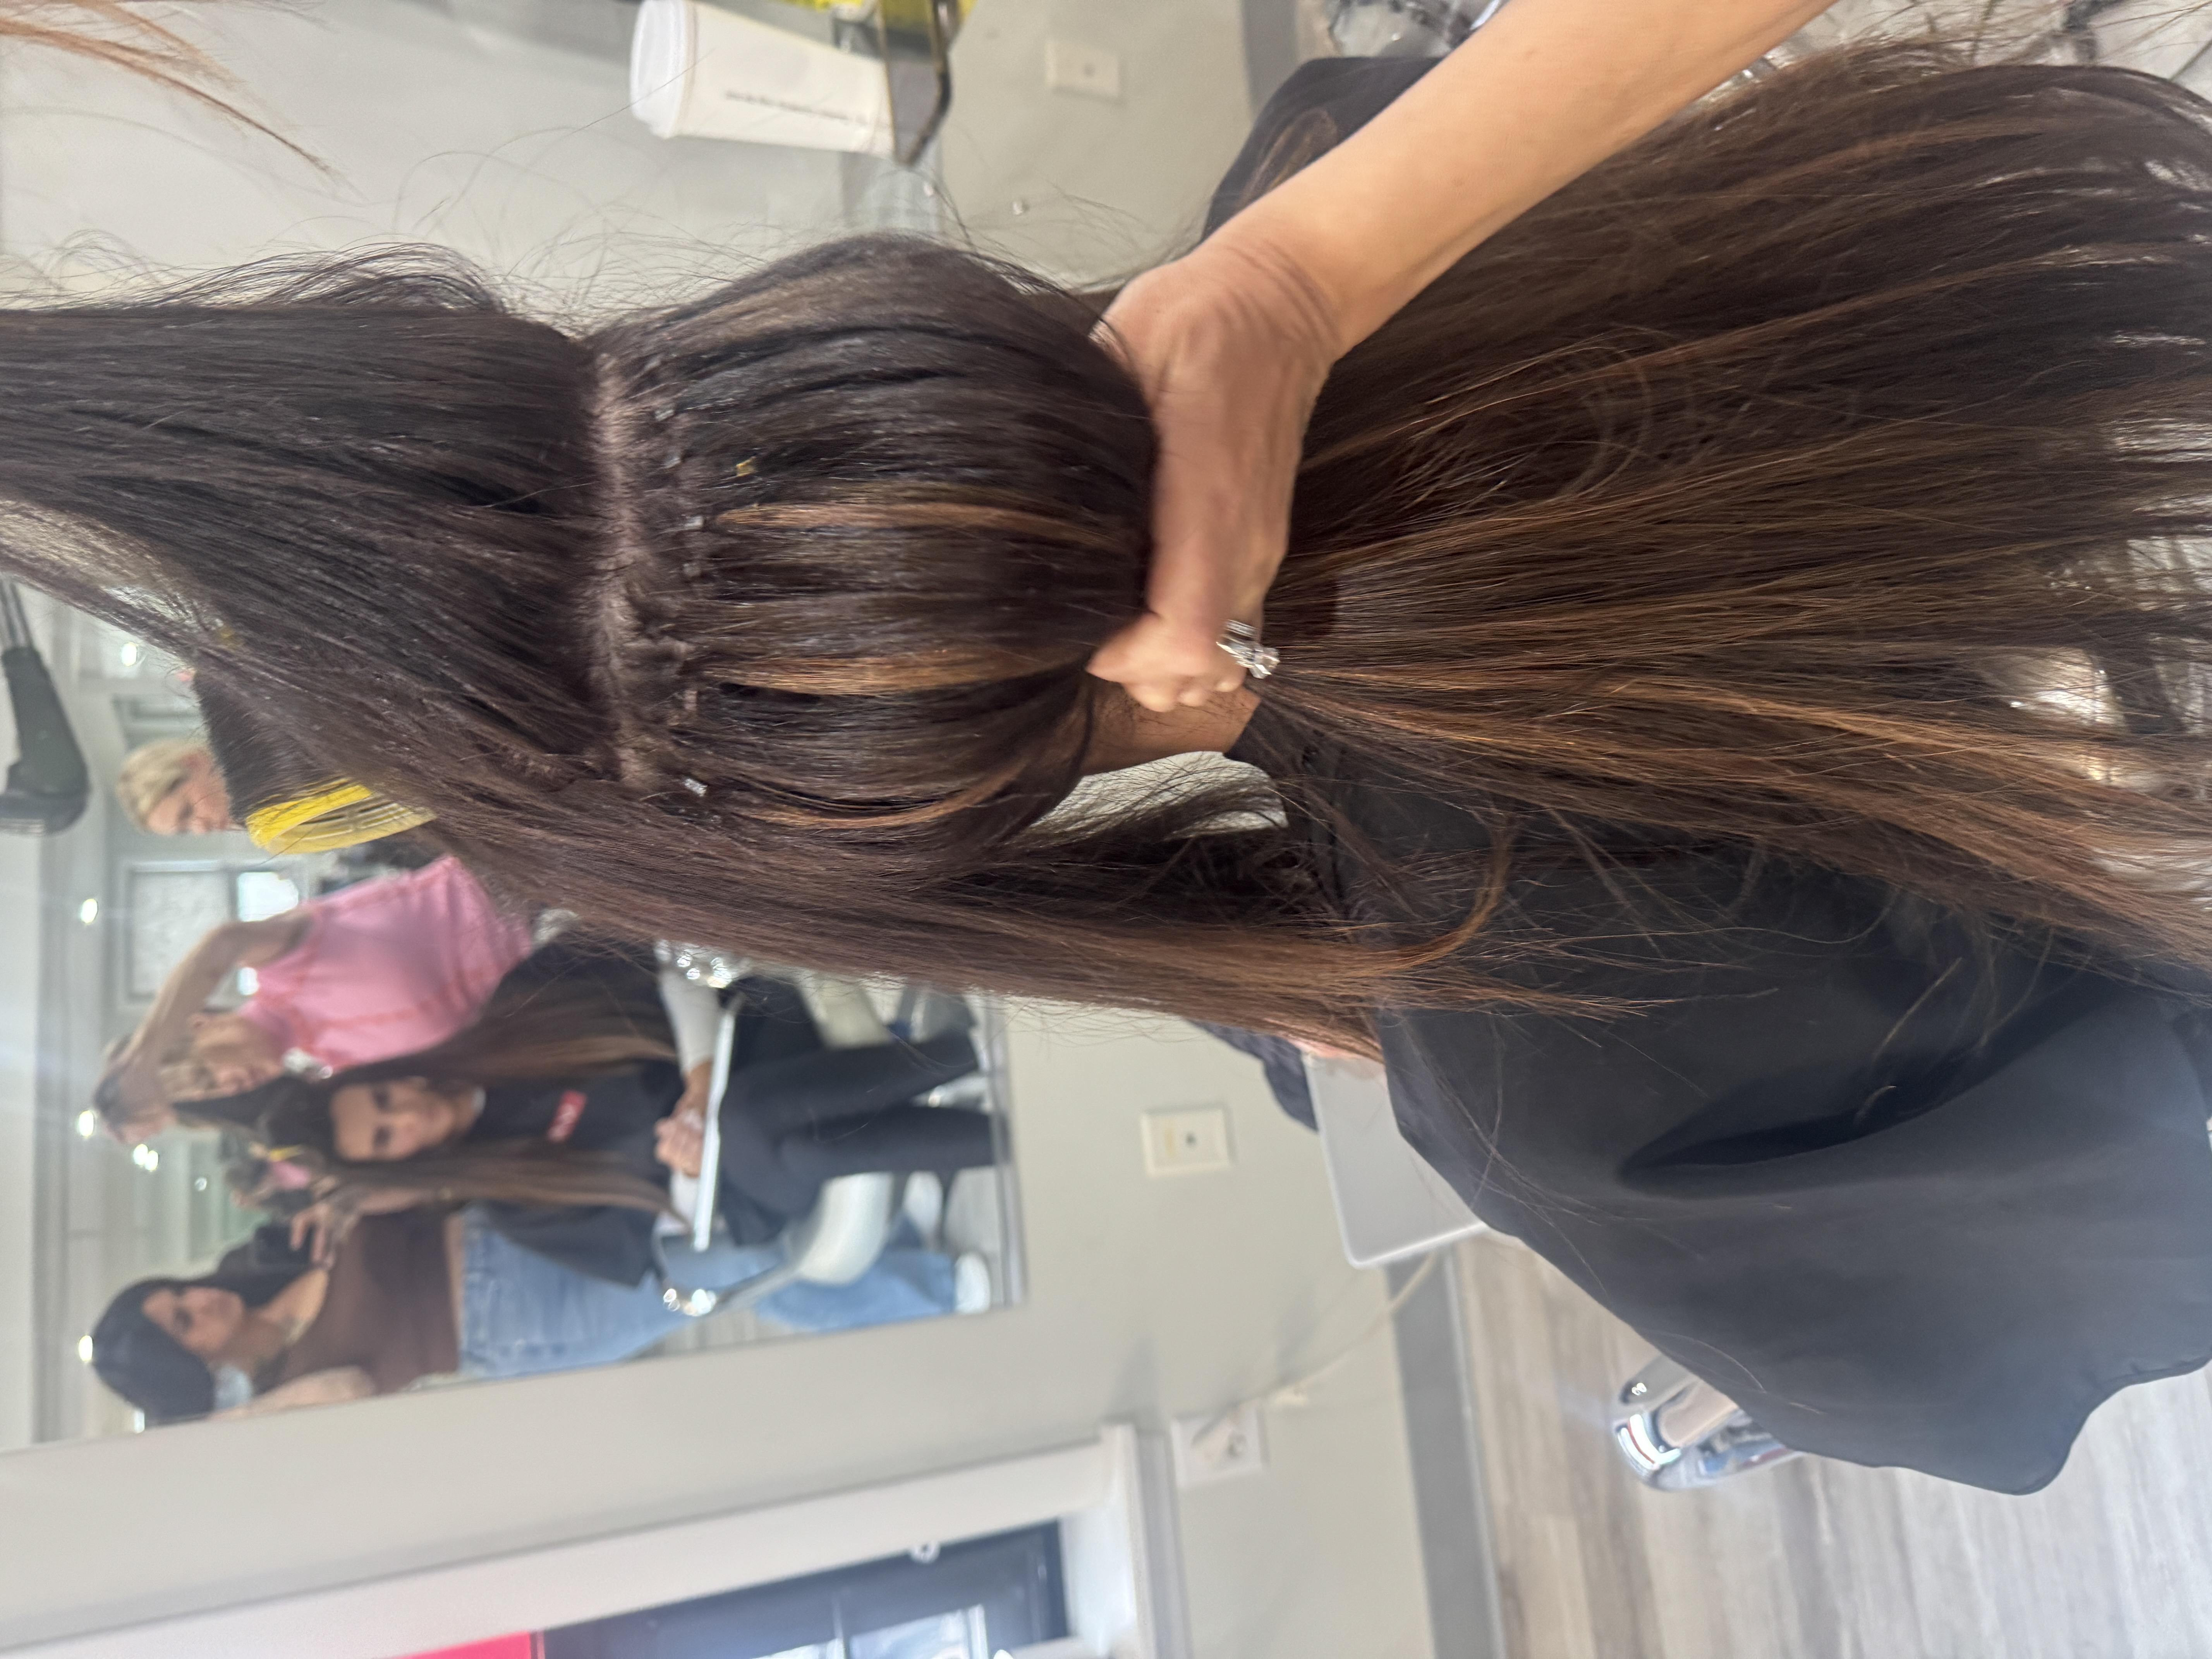
3. How to Attach Beaded Sew-In Hair Extensions?
 Here's a step-by-step process of attaching beaded sew-in hair extensions:
What you’ll need:
-
Weft hair extensions
-
Micro-beads (silicone-lined)
-
Loop tool or pulling needle
-
Pliers
-
Sectioning clips
-
Rat-tail comb
Steps:
-
Section your natural hair: Start by parting your hair horizontally near the nape of your neck. Clip away the top layers and leave the bottom section exposed for the first row of beads.
-
Apply the beads: Using a loop tool, thread small sections of your natural hair through the silicone-lined beads. Space the beads evenly along the part line—these will act as anchor points for the weft.
-
Secure the beads: Slide each bead up close to the scalp and clamp it shut with pliers. Make sure they’re snug but not too tight to avoid discomfort.
-
Sew the weft to the beads: Thread a curved needle with strong, color-matched thread. Starting at one end of the weft, sew it directly through the beads and over the weft, anchoring it securely along the row.
-
Knot and finish: Once you reach the end of the row, tie a firm knot to secure the thread and snip off any excess.
-
Repeat for additional rows: Continue this process moving upward section by section, depending on how much volume or length you want to add.
-
Style and maintain: Blend your extensions with your natural hair using a flat iron or curling wand. At night, wrap your hair in a silk or satin scarf to reduce friction and maintain the style longer.
4. How to Attach Keratin Bond Hair Extensions?
 Here's a step-by-step process of attaching keratin bond hair extensions:
What you’ll need:
-
Pre-bonded keratin extensions
-
Heat fusion tool
-
Sectioning clips
-
Rat-tail comb
-
Heat protectant
Steps:
-
Wash and dry your hair thoroughly: Use a clarifying shampoo to remove product buildup and oils. Avoid conditioner near the roots as it can reduce bond strength. Dry your hair completely before starting.
-
Section your hair: Begin at the nape of your neck and section your hair horizontally using a rat-tail comb and clips. Clip the top layers out of the way.
-
Take a small section of your natural hair: About the size of a grain of rice. This will ensure the keratin bond blends naturally and isn’t too bulky.
-
Place the pre-bonded extension underneath your natural strand: Hold the keratin tip close to the root (but not touching the scalp).
-
Melt and fuse the bond: Use the heat fusion tool to melt the keratin bond around your natural hair. Roll the bond gently between your fingers to seal it. Let it cool and harden.
-
Repeat section by section: Work your way up your head in neat, horizontal rows until the desired areas are filled.
-
Style gently: Wait at least 24–48 hours before washing your hair. Avoid oil-based products near the bonds to prevent slippage.
5. How to Attach Micro-Link (I-Tip) Hair Extensions?
 Here's a step-by-step process of attaching micro-link (I-Tip) hair extensions:
What you’ll need:
-
I-tip hair extensions
-
Micro-beads (silicone-lined)
-
Pulling needle or loop tool
-
Pliers
-
Sectioning clips
-
Rat-tail comb
Steps:
-
Start with clean, dry, and product-free hair: Wash with a clarifying shampoo and skip the conditioner to ensure a strong grip.
-
Section your hair: Create horizontal sections, starting from the nape and working your way up. Clip away the top layers to keep them out of the way.
-
Thread a micro-bead onto your loop tool: Slide one bead onto the loop tool in preparation for each strand.
-
Pull a small section of natural hair through the bead: Use the loop tool to pull your natural hair through the micro-bead. The section should be small but secure.
-
Insert the I-tip extension: Place the stick-like tip of the extension into the bead, alongside your natural hair.
-
Clamp the bead with pliers: Use pliers to flatten the bead, securing both the extension and your natural strand in place.
-
Repeat across your head: Continue sectioning and applying extensions row by row until the desired look is achieved.
-
Style as usual: Be gentle while brushing and avoid tugging on the roots. Avoid oily products near the beads to reduce slippage.
What are some Tips to Keep Your Extensions Flawless After Attachment?
Once your hair extensions are in place, proper care is essential to keep them looking smooth, healthy, and natural. Whether you’ve opted for clip-ins or long-term methods like tape-ins or keratin bonds, daily maintenance and the right products can significantly extend the life of your extensions and prevent tangling, dryness, or slippage.
Here are some key tips to follow:
-
Brush gently and use a loop brush or wide-tooth comb on a daily basis to avoid pulling or breakage.
-
Use sulfate-free, extension-safe products to cleanse and condition without weakening adhesives or bonds.
-
Avoid applying heat directly to bonds or tape tabs to prevent loosening.
-
Sleep with your hair in a loose braid or ponytail to reduce friction and tangling overnight.
-
Limit heavy oils or conditioners near the roots if you’re wearing tape-ins or keratin bonds.
-
Schedule touch-ups or repositioning every few weeks if you're wearing semi-permanent extensions.
With the right care, your extensions will continue to blend seamlessly and stay gorgeous for weeks, or even months, after application.
Trust the Experts: Why Professional Application Matters?
No matter which type of hair extension you choose, attaching them correctly is key to achieving a flawless, long-lasting look. And while some methods may seem DIY-friendly, the truth is that proper installation always benefits from professional expertise. That’s where Noelle Salon comes in.
At Noelle Salon, we specialize in precision hair extension applications tailored to your hair type, lifestyle, and desired results. Our team of expert stylists ensures your extensions blend seamlessly with your natural hair, are installed safely, and look absolutely stunning from every angle. We don’t just apply extensions, we transform your hair with custom color matching, thoughtful placement, and salon-grade care.
Let your dream hair start with the right foundation. Book your appointment with Noelle Salon today and experience the difference professional styling makes.
Frequently Asked Questions
1. How to attach clips to hair extensions without sewing?
You can attach clips to hair extensions without sewing by using a strong fabric or wig glue. Simply apply the glue to the back of the clip and press it firmly onto the weft of hair. Allow it to dry completely before wearing to prevent breakage and ensure a secure and lasting hold.
2. How to attach hair extensions to short hair?
To attach hair extensions to short hair, start by smoothing or braiding the bottom layers to create a flatter base. Use small wefts of hair and place them strategically to avoid bulk and ensure coverage. For the most natural finish, blend your own hair with the extensions using a straightener or curling iron.
3. Can I use heat styling tools on my extensions?
Yes, you can use heat styling tools on human hair extensions. If you have synthetic hair, make sure the extensions are heat-resistant before you use any tools on them. Always ask a hairdresser for tips on which heat setting you should use to curl or straighten your extension hair. This will help you keep your hair extensions in good shape and also prevent hair loss in the long run.
4. How to attach hair extensions without clips?
You can attach hair extensions without clips using alternative methods like tape-ins, sew-ins, keratin bonds, or micro-link extensions. These options provide a more secure and long-lasting hold compared to clip-ins. The right method depends on the type of hair, styling needs, whether you want a more natural look, and how long you want to keep the extensions in place, etc.
5. How do I remove hair extensions safely?
Taking out extensions the right way is important, so you do not hurt your real hair. You should ask about this to a professional stylist at Noelle Salon who knows a lot about micro links, beads, fusion, keratin, or cold fusion. If you have extensions that use glue, you need to use a remover made just for this. If your extensions have beads, special tools work best. These things will help keep your individual strands safe and in good shape.


