
Revive Your Summer-Damaged Hair Extensions: A Step-by-Step Guide
Summer sun, chlorine, ocean salt, wind, and long days outdoors can leave even premium hair extensions looking parched, rough, and tangled. These seasonal elements strip moisture, raise the cuticle, and encourage matting—especially because extensions don’t receive scalp oils the way our natural hair does. A common misconception is that more heat styling or extra hairspray will “smooth” things out; in reality, alcohol-based products, over-drying, and hot tools often make damaged hair extensions worse. If your pieces are under six months old and feeling dry or frazzled, there are proven repair techniques you can try at home. If they’re older than six months and extremely brittle, results may be limited—but careful hair extension maintenance can still help you get more wearable days from them.
The most effective at-home method I’ve used to revive hair extensions in Boston is the boiling water technique. It helps rehydrate and soften fibers when used carefully. This process is suitable for most human-hair wefts and clip-ins but should not be used on extensions with keratin bonds, i-tips, or on synthetic hair.
The goal is to infuse moisture back into dry, matted strands. Because natural oils do not travel through extensions like they do in our own hair, they are more vulnerable to dehydration and friction from summer activities. A controlled hot-water bath can help push conditioner deeper into the hair. Always remove any clips or attachments you can before starting.

Alt text ideas for images (accessibility + SEO):
- Close-up of revitalized hair extensions treated for summer damage, showcasing shiny and smooth strands.
- Step-by-step process for rehydrating damaged hair extensions using hot water treatment.
- Infusing conditioner into hair extensions using a controlled hot-water bath for effective summer damage repair.
- Comparison of damaged versus treated hair extensions, highlighting effective home repair methods and moisture restoration.
Steps
-
Boil fresh water
Fill a large pot with enough water to fully submerge your extensions and bring it to a boil. -
Remove from heat
Take the pot off the stove and let the rolling bubbles settle so the water is very hot but calmer. -
Pre-clean the hair
While the water heats, gently wash the extensions with a sulfate-free shampoo to remove product buildup and sunscreen residue. -
Create a hot conditioner bath
As the water cools slightly, stir in about two tablespoons of conditioner until fully dispersed. You’re making a very hot, diluted conditioning bath. Note: My go-to for this step is Nexxus Humectant Conditioner (available at major retailers). Humectant formulas draw in moisture, which is why this long-time favorite works well here. -
Steep the extensions
Place the hair into the hot bath and let it soak for 15 to 20 minutes so hydration can penetrate. -
Rinse gently
Remove the hair and lightly rinse with tepid water to remove excess conditioner without shampooing again. -
Blot, do not rub
Pat dry with a towel and lay the extensions flat on a clean towel to protect the cuticle. -
Air-dry and detangle
Allow the hair to air-dry partially, then detangle with a wide-tooth comb, working from the ends upward. -
Add leave-in moisture
On damp hair, mist with Nexxus Humectant Leave-In Conditioner to lock in hydration. -
Finish and smooth
Let the hair dry overnight, then brush with a boar-bristle brush. If still slightly damp, you can finish with a low-heat blow-dry using a heat protectant.
- Safety reminder: Allow the hot water to cool before discarding to avoid burns.
- If the hair still feels rough after drying, repeat the hot conditioner bath once more. For stubborn tangling, add a pea-sized amount of lightweight hair oil to the mid-lengths and ends and focus on gentle detangling. If there’s no improvement after a second round, the fibers may be too compromised for further at-home repair techniques.

Your extensions are now ready for reapplication. As mentioned above, do not use this technique on pre-bonded keratin hair extensions, tape hair, or i-tip pieces, since heat and water can break down the keratin, tape, or tip components. To maintain these systems, I recommend gentle cleansing and added hydration with humectant shampoo, conditioner, and leave-in.
This method is ideal for clip-in hair extensions, hair toppers without glue or tape, and most weft styles, including genius weft, volume weft, machine weft, and hand-tied wefts.
After reviving your hair, try to limit alcohol-heavy styling products and minimize hot tools. Aim for low-friction styles, sleep on a silk pillowcase or wear a protective braid, and brush gently. With mindful post-repair care, your refreshed pieces can often stay wearable for a few extra months.
Keep in mind that very low-grade human hair may not respond well. If matting is caused by mixed or non-Remy hair—often collected from brushes with cuticles misaligned—the strands can remain rough despite conditioning. Because the cuticle does not flow in one direction, tangling increases and longevity drops to only a few months, regardless of summer exposure.
Quick scenario for inspiration: Imagine you’ve worn your favorite clip-ins to the beach all season. They feel dry, look dull, and tangle at the nape. You try the boiling water conditioner bath, follow with a leave-in, and let them dry overnight. The next day, the hair feels softer, detangles faster, and holds a smooth finish—proof that simple at-home repair techniques can help revive damaged hair extensions when the fibers are still healthy enough.
I hope you’ll try this—carefully—when working with very hot water. I’ve used this approach many times with great results. If you have tips for treating damaged hair extensions or questions about the process, share them in the comments. What have you tried to revive yours—deep conditioning soaks, oil treatments, or other methods?
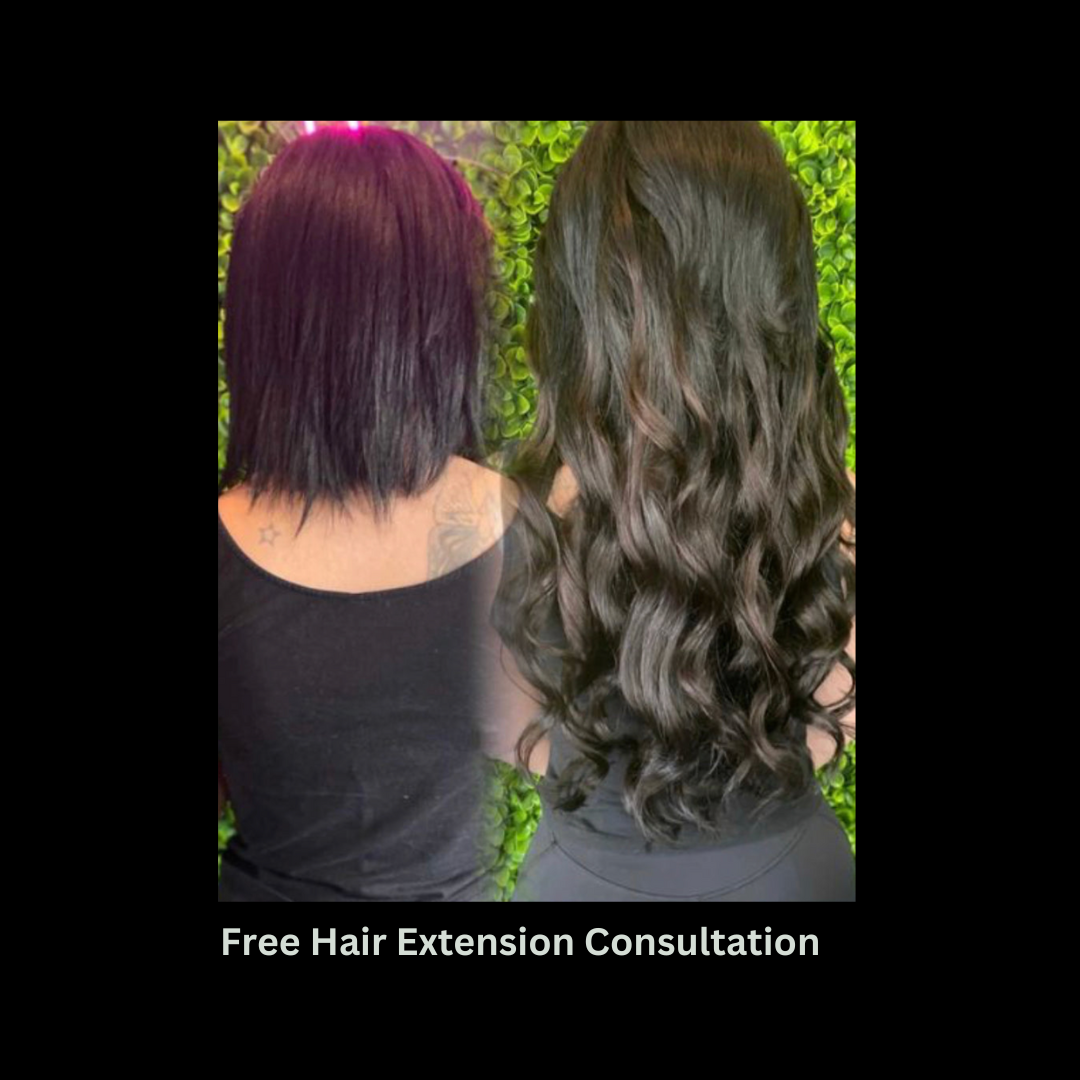
Hair Extensions Background
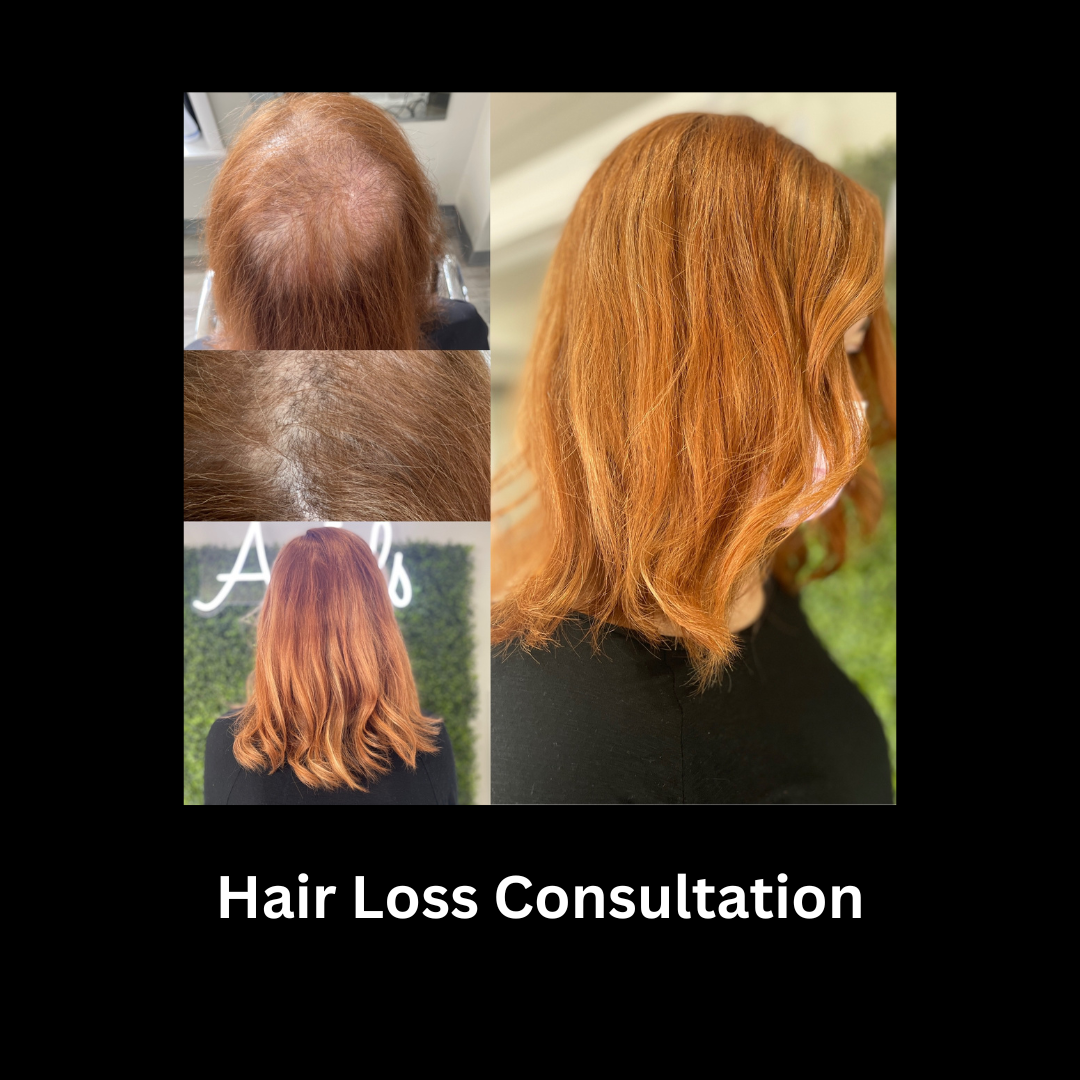
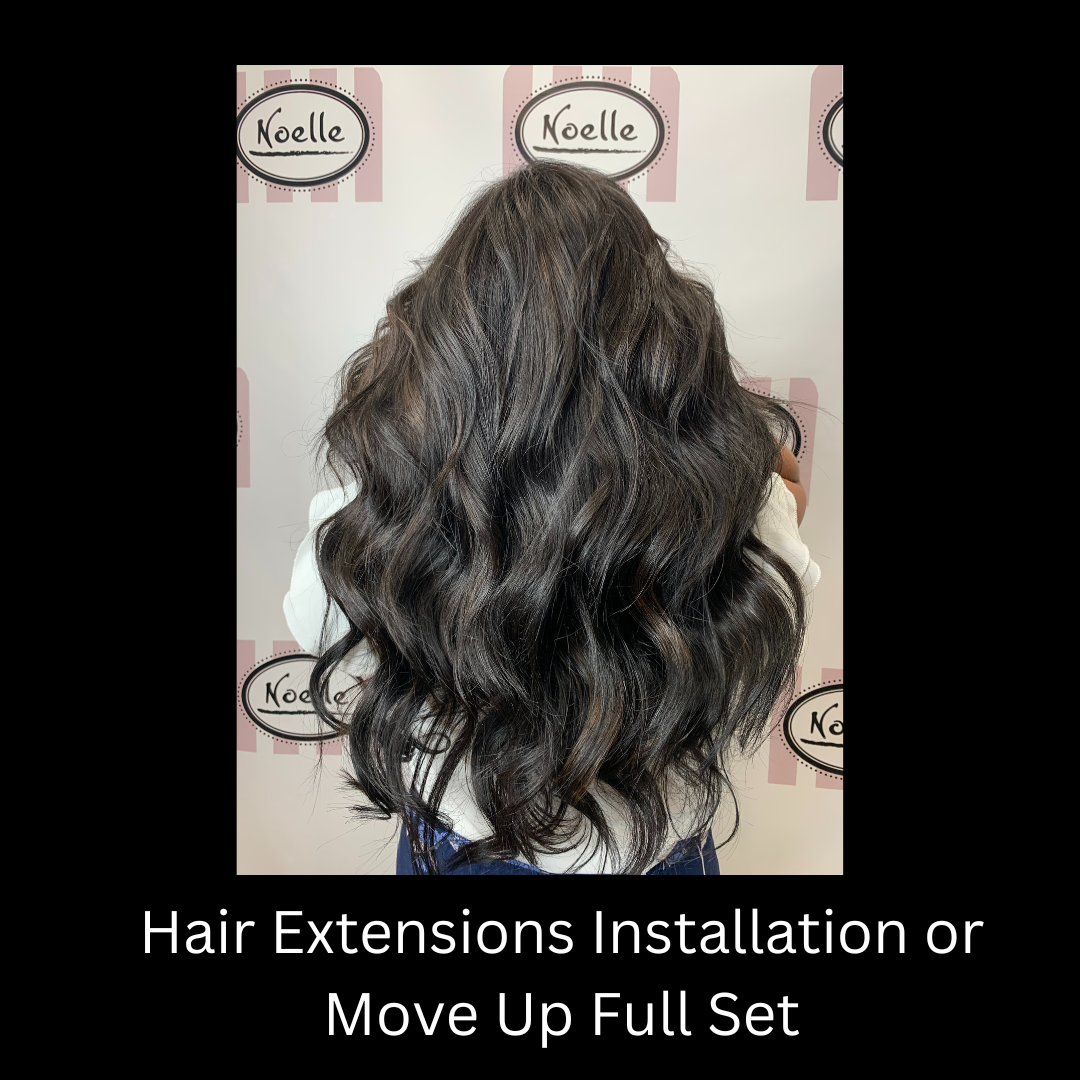
At Noelle Salon, the team evaluates your natural hair and listens to your goals for styling, color match, and overall look. They use human hair extensions such as 100% Remy human hair or Virgin Hair (unlike Bellami hair). Extensions can add fullness to short hair or create length up to 24 inches, and stylists work with a range of methods—tape-in extensions, clip-in hair extensions, and keratin—while favoring the Veila Pull-thru method with Veila Hair Extensions for easy care. Styling options include flat-ironed sleek, natural wave, or defined curls. Whether you want a one-day change like a clip-in ponytail or a long-term transformation, a high-quality ponytail extension can refresh your style instantly. Your hair growth journey can also benefit from protective styling and regular hair extension maintenance to keep both your natural hair and the extensions healthier for longer. Choosing quality extensions matters: Remy and Virgin hair align the cuticle in one direction for smoother texture, better shine, and longer wear. Cheaper alternatives may mix hair sources, include silicone coatings that wash off quickly, and lead to faster dryness, tangling, and shedding—risks that often limit how well any repair techniques will work. If you’re considering a change, explore your options with a professional at a free hair extension consultation we can recommend methods that match your hair type, lifestyle, and maintenance comfort.


