
A Simple Home Guide to Safely Remove K-Tip Hair Extensions

Have you ever struggled with removing hair extensions in Boston at home? K-tip hair extensions removal can feel intimidating, especially if it’s your first time attempting DIY hair extension removal without a stylist by your side. Removing keratin bond hair extensions takes patience and the right technique because natural hair sheds daily—often over a hundred strands. While you wear keratin bonds, that shedding accumulates above each bond, creating a compacted ring of shed hair that must be gently worked out during removal. If the extensions have been in for over five months, expect a bit more effort to safely release that trapped shedding without stressing your natural hair.
On the flip side, freshly applied keratin tips can be tougher to remove because new bonds are firmer and less pliable. Keratin tends to soften slightly with wear as it’s exposed to washing, brushing, and styling, so newer bonds usually require extra care to crack effectively. The key is to work slowly, reapply remover as needed, and resist tugging or yanking on your natural hair.
My advice on removing keratin hair extensions is largely geared toward professional stylists, but if you choose to do this at home, proceed carefully. Read through the entire guide first, prepare your tools, and give yourself ample time. A thoughtful, step-by-step approach to keratin bond removal protects your scalp, preserves the integrity of your strands, and sets you up for easier styling after the extensions come out.
Best Hair Extension Removal Solution
Over my thirty-year tenure working with keratin-bonded hair extensions (also known as fusion hair), I’ve tested a wide range of removal options. Heavy oils like olive oil and coconut oil are often recommended online, but they don’t reliably dissolve keratin and can leave a heavy residue that’s difficult to shampoo out. I also tested a popular remover called “D bond Keratin Hair Extension Remover.” A small bottle is $20, and in my experience it did not outperform the simple solution I mix myself. Just as important, never apply heat to “melt” bonds during keratin bond removal—heat can spread adhesive, mat shedding into the bonds, and create more tangles throughout the head.
Below are the ingredients and mixing instructions for the remover I use. It’s straightforward, cost-effective, and helps k-tips slide more easily without leaving your hair coated in excess oil.
1) In a 4-ounce color bottle, add 3 ounces of 50% rubbing alcohol (I prefer “Swan” Wintergreen Brand). The minty scent keeps the process feeling clean and fresh.
2) In the same bottle, mix in 1 ounce of Aloe Vera Gel found online or at a drugstore. The gel’s slip helps loosen bonds and allows the k-bonds to glide out more smoothly.
3) Shake to combine thoroughly, then use the pointed tip of the applicator to dispense a few drops directly onto each bond.

How to Prepare for the Removal of Keratin Bond Hair Extensions
Preparation is the secret to stress-free, DIY hair extension removal. A few days before you plan to remove your k-tips, apply a rich conditioner to the bonds themselves (not diluted with water). A concentrated product allows the proteins and emollients to sit on the bonds and subtly soften them. While this won’t “dissolve” keratin, it can reduce stiffness and make bonds easier to crack later. Keep hair fully dry when you sleep—going to bed with damp lengths can increase tangles and make detangling around the bonds harder on removal day.
On the day of your keratin bond removal, start with gentle detangling. Mist a light detangler on mid-lengths and ends, then comb from ends upward in small sections, supporting the hair near each bond to avoid pulling at the root. The purpose of prep is to free up everyday tangles so you’re dealing only with compacted shedding around the bonds—not fresh knots created by rushing.
Set up a clean, well-lit area with a mirror, clips for sectioning, towels to protect clothing, and a trash bin for discarded bonds. Having a tidy workspace keeps the process organized and helps you move steadily from section to section without losing track of which bonds you’ve already treated.
What Tools and Supplies are Needed for Keratin Bond Removal
Having the right tools for keratin bond removal makes the process faster and gentler on your hair. Are you sure you have all the necessary tools before starting the removal process? Here’s what to gather and why each item helps:
- Rat tail comb: The pointed end makes precise parting simple, while the fine teeth help tease out minor tangles near the bonds without snagging.
- Removal pliers: Stainless steel pliers distribute pressure evenly to crack the keratin shell with fewer squeezes, reducing strain on your natural hair.
- Keratin bond remover: A suitable remover softens bonds and adds slip so extensions slide out with minimal resistance.
- Hair clips: Sectioning clips keep hair organized so you can focus on one small area at a time.
- Fine-tooth and wide-tooth combs: Use wide teeth to detangle after bonds are out, and fine teeth to coax out compacted shed hair.
- Soft towel or cape: Protects clothing and catches flakes of cracked keratin for an easy cleanup.
- Leave-in conditioner or detangler: Adds slip after bond removal so remaining shed hair can be removed gently.
- Boar-bristle brush: Distributes natural oils and smooths the cuticle after all bonds are removed.
These tools work together to help you move steadily through each section, minimize tugging, and preserve the integrity of your natural hair while removing keratin tips at home.

How To Remove K-Tip Extensions
Have you ever faced challenges with stubborn bonds while removing extensions? The steps below simplify K-tip hair extensions removal so you can proceed safely and confidently.
1) Use a flat nose plier or a hair extension removal plier to crack each bond three to four times. Place the pliers over the bond, apply firm but controlled pressure, and release. Rotate the pliers slightly and repeat. Avoid squeezing the same exact spot repeatedly; distributing pressure helps fracture the shell cleanly.
2) After cracking, slide the extension down and away from your natural strands. If it doesn’t move freely, don’t pull—reapply remover, give it a minute to work, and gently try again. Once the extension slips out, you’ll address the compacted shedding at the root area.
Professional Tips to Remove Hair Shedding
3) Use a straight stainless steel end dental probe to tease out residual shedding carefully. Because the tip is sharp, work slowly and direct the probe away from your scalp. Insert the tip gently into the compacted ring of shed hair and move in several directions to loosen the knot. Avoid curved tips; a straight end gives better control and reduces the risk of scraping your scalp.
This simple tool is a lifesaver for stubborn rings of shed hair that collect above bonds. Used carefully, it helps release compacted fibers without breaking healthy strands or creating new tangles.
4) Once the shedding loosens, apply a light layer of leave-in conditioner over the area. Then use a fine-tooth comb to coax out the remaining shed hair, supporting your strands near the root with your fingers to prevent tension.
5) After all keratin bonds are out, gently brush through with a wet brush, then follow with a boar's bristle brush to distribute natural oils and smooth the cuticle. This two-step brushing helps reset your hair’s texture after keratin bond removal.
Now it’s time to cleanse. Use a quality clarifying shampoo—such as Moroccan Oil Clarifying Shampoo—to thoroughly remove residue without over-stripping. Lather, rinse, and repeat if needed until hair feels clean and light.
If you plan to reapply hair extensions, skip conditioner so the hair remains residue-free and ready for bonding. If you’re taking a break from extensions, use a hair mask from mid-lengths to ends to rehydrate, then rinse well before styling.
When reapplying keratin hair extensions, mist a very light leave-in to detangle, brush gently with a wet brush, then switch to a wide-tooth comb to preserve slip without leaving heavy product. Rinse thoroughly—at least four to five minutes—to ensure the hair is pristine before any new application.
This removal technique consistently protects natural hair when done patiently. The most important rule is to take your time and avoid tugging. Working in small, organized sections helps you remove each extension cleanly and keeps your scalp comfortable throughout the process.
Steps for Breaking Down Keratin Extensions
Keratin bond removal is most successful when you break each step into small, predictable motions. First, section your hair using the rat tail comb, clipping away everything except the small area you’re working on. Isolate one bond at a time.
Apply your remover directly to the bond and wait a minute to let it soak. You’ll know it’s ready when the bond surface feels slightly tacky or softened rather than glossy and rigid. Place the pliers over the bond and squeeze gently but firmly, then release and rotate the pliers a quarter turn. Repeat to crack multiple sides. This multi-angle approach allows the keratin shell to fracture into smaller pieces that release more easily.
After cracking, hold your natural hair near the roots to stabilize it, then slide the extension down. If you feel resistance, pause and reapply remover rather than pulling. It’s normal for compacted shedding to hold on slightly even after a good crack; that’s why the probe and fine-tooth comb are helpful for the final release.
Continue through each section at a comfortable pace. Keep a towel on your shoulders, and periodically brush away keratin flakes so they don’t travel into other sections. With patience, you’ll create a rhythm: apply remover, crack the bond, slide out the tip, loosen shedding, and comb smooth before moving on.
Common Mistakes to Avoid During K-Tip Removal
- Rushing the process: Pulling on a bond that hasn’t softened can cause unnecessary tension at the root. Always reapply remover and wait.
- Using heat to “melt” bonds: Heat spreads adhesive and can create widespread tangling that’s difficult to correct.
- Skipping sectioning: Working without clean sections leads to confusion and increases the chance of catching neighboring hair in the pliers.
- Over-saturating with heavy oils: Oils don’t reliably dissolve keratin and may leave residue that makes shampooing more difficult later.
- Tugging through compacted shedding: Use the probe and a fine-tooth comb with leave-in conditioner to gently release rings of shed hair instead of forcing them.
- Not supporting the root: Always hold your hair near the scalp while sliding extensions out to minimize stress on follicles.
- Reapplying without thorough rinsing: Residue interferes with new bonds. Rinse hair thoroughly if you plan to install new keratin tips.
Time Required for Removing Keratin Extensions
The time needed for keratin extensions removal depends on bond condition, number of bonds, hair density, and how well you prep. A straightforward case with well-maintained bonds may take about 1–2 hours. If bonds are extra firm, if there’s significant compacted shedding, or if hair is very dense, expect closer to 3–4 hours. Creating generous time blocks helps you stay relaxed and patient throughout the process.
What has been your experience with removing hair extensions at home? If you’ve rushed in the past, you might recall more tangles, sore roots, or lingering residue. By contrast, setting realistic time expectations allows you to reapply remover when needed, rotate the pliers without hurrying, and properly release shed hair. If your hair is severely matted or you’re feeling uncertain, consider booking a professional appointment to protect your natural hair and save time in the long run.
To refine your personal time estimate, consider these scenarios: if bonds feel soft and move slightly when pressed, you’ll likely move faster. If they feel rigid and glossy, allow extra time for more cracking passes. If you’ve worn the set for many months, expect more compacted shedding at the roots and build in breaks to prevent hand fatigue. Patience is always more efficient than forcing a quick outcome.
Understanding Different Keratin Extension Types: Standard, Micro, and Nano Bond Sizes
Not all keratin tips are the same. Bond size influences how discreet the extensions appear, how they move with your hair, and how removal feels. Smaller bonds can blend more seamlessly in fine hair, while larger bonds may be ideal for thicker, denser textures. During keratin bond removal, smaller tips often require more repetitions because there are more attachments, whereas larger tips may come out with fewer total cracks but sometimes need firmer plier pressure.
|
Type of Bond |
Description |
|---|---|
|
Standard Bond |
The most common type, suitable for medium to thick hair. They provide a strong hold and are generally easier to remove. |
|
Micro Bond |
Smaller in size, micro bonds are ideal for fine hair types. They blend seamlessly and offer a more natural look, but require more skill during application and removal. |
|
Nano Bond |
The smallest bonds available, nano bonds are perfect for ultra-fine hair. They are less visible and provide a lightweight feel, but can be more challenging to work with and may require professional handling. |
Choosing the right bond size helps ensure a natural-looking result and a smooth experience from installation through keratin bond removal. If you’re unsure which category your current set falls into, examine a single tip: larger, flatter tips are often standard bonds, while micro and nano tips look noticeably slimmer and more delicate.
Troubleshooting Stubborn Bonds and Tangles
Even with meticulous technique, you may encounter a few difficult bonds. When that happens, treat the area like a mini project:
- Reapply remover and allow an extra minute or two of contact time.
- Crack the bond from a different angle; change plier orientation to reach fresh surfaces.
- Stabilize the hair at the root with one hand while you slide with the other to reduce pull.
- Use a pea-sized amount of leave-in conditioner to add slip before combing out compacted shedding.
- If the bond still won’t budge, move to a different section and come back—short breaks let remover continue working passively.
For moderate tangling around several neighboring bonds, reset: detangle the ends first with a wide-tooth comb, then return to the roots. Working from ends toward the scalp prevents driving knots higher and compounding the problem near your attachments.
Aftercare Once Keratin Tips Are Removed
After DIY hair extension removal, focus on soothing your scalp and restoring balance to your strands. Start with clarifying shampoo to remove residue. If you’re not reapplying, follow with a hydrating mask focused on mid-lengths and ends. Once dry, check for unevenness in density or small leftover rings of shed hair; a quick pass with a fine-tooth comb or the probe can tidy those areas.
Over the next week, be gentle with heat styling. Emphasize low heat, use a heat protectant, and brush with a boar-bristle brush to distribute oils evenly. This helps your hair recover and maintain shine. If you plan to reinstall keratin tips, avoid heavy conditioners or oils right before your appointment so bonds adhere properly.
Hypothetical Scenarios to Guide Your Approach
Imagine removing a set worn for six months: you might find more compacted shedding at the roots, so you’ll budget additional time, keep remover within reach, and work in smaller sections. In contrast, if you recently had extensions installed and need them out sooner, expect firmer bonds; you’ll rely on extra cracking passes and careful, repeated remover application, pausing whenever resistance appears.
Consider what happens if you rush: you crack once, tug, and the bond doesn’t move. Tugging again tightens knots and can stress the follicle. Now you must stop, soothe the area with leave-in, and spend extra time detangling. By slowing down at the first sign of resistance, you prevent a minor snag from becoming a major tangle.
The Cost of Professional Removal in a Salon
The cost for professional removal of keratin bond extensions in a salon typically ranges from $80 to $120, with variables like total bond count, how long you’ve worn the set, and the presence of matting or heavy residue influencing the final price. Extensive compacted shedding or very firm bonds can extend appointment time and may increase cost accordingly.
Why Invest in Professional Extension Removal
Professional removal safeguards your natural hair. Skilled stylists know how to apply just the right pressure with pliers, when to reapply remover, and how to manage compacted shedding without breakage—often preserving the extensions for potential reuse. If you’re new to K-tip hair extensions removal, or if your hair is severely tangled, a salon visit can be the most efficient and comfortable route.
FAQs About DIY Keratin Bond Removal
Will clarifying shampoo alone remove keratin tips? No. Clarifying shampoo helps remove residue after bonds are out, but it won’t crack or dissolve the keratin itself. You still need a remover and pliers.
Can I use household oils instead of remover? Heavier oils rarely break down keratin effectively and can leave residue. For best results, use a remover designed to add slip and assist with cracking.
How can I reduce shedding “rings” at removal time? Keep up with gentle root-area brushing while wearing extensions, avoid sleeping with wet hair, and follow a maintenance schedule so compacted shedding doesn’t build up excessively.
Do micro and nano bonds take longer to remove? Often, yes—there are more attachments, and each may require several cracking passes. Plan extra time if your installation used very small bonds.
Safety and Comfort Tips
Protect your scalp by supporting hair at the root whenever you slide a tip. If your arms or hands feel fatigued, take a short break to maintain precise, gentle movements. Keep a small towel nearby to wipe away remover that runs down the strand so it doesn’t reach your eyes or skin. Finally, check progress in a mirror frequently—good visibility prevents accidental tugging and ensures you don’t miss any leftover keratin fragments.
Enhancing Results With Smart Sectioning
Divide your head into quadrants: back-left, back-right, front-left, and front-right. Within each quadrant, work in horizontal slices no thicker than your rat tail comb’s fine teeth. Clip away any hair you’re not addressing. This simple system helps you track completed areas and keeps your hands focused. When you finish a slice, brush through gently before moving upward to the next slice.
Conclusion: Confident, Gentle Keratin Bond Removal at Home
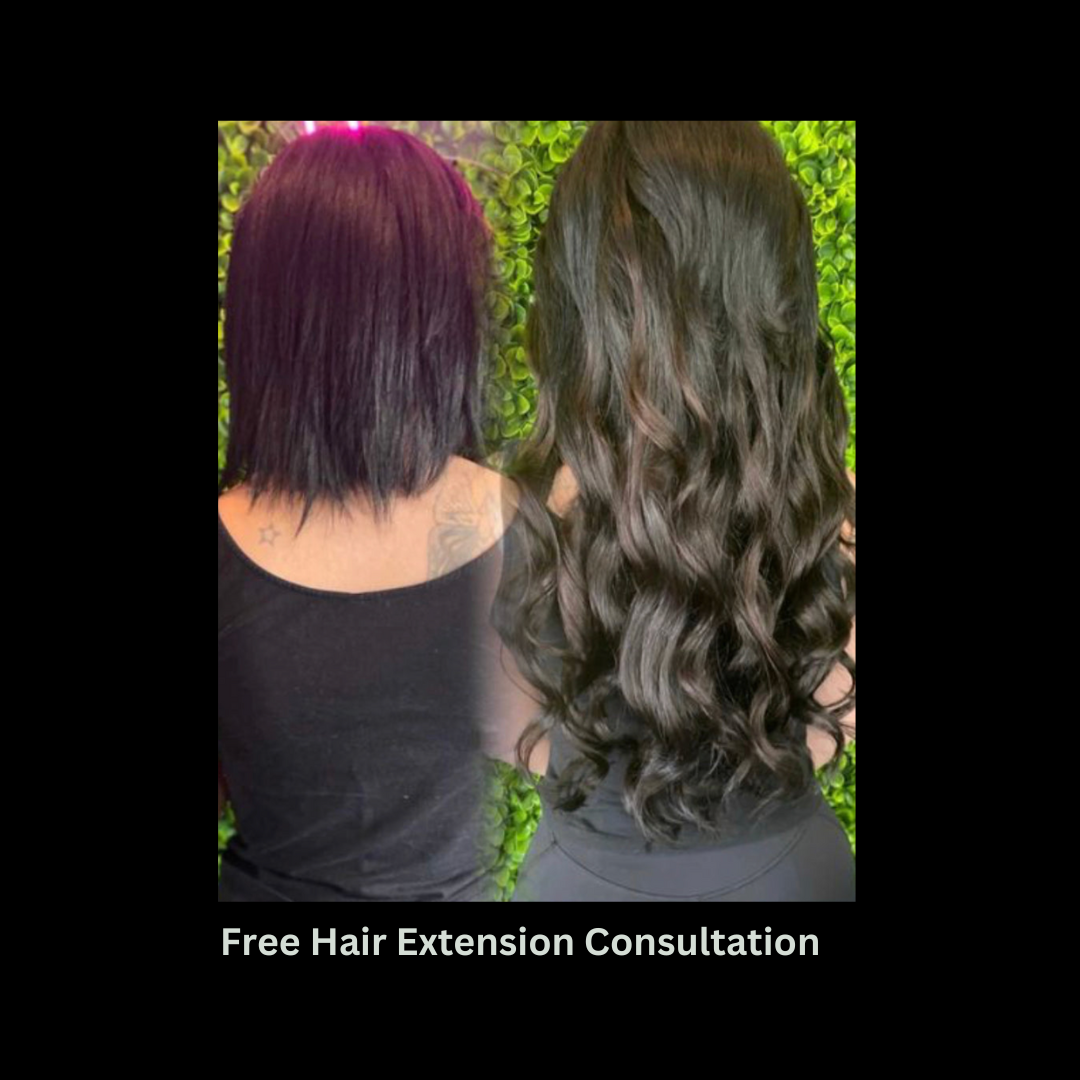
While DIY hair extension removal can be done with care, patience, and the right tools, professional removal is always the safest way to protect your natural hair and avoid unnecessary tension or breakage—especially with keratin bonds. If you’re transitioning to a new set or taking a break, a gentle, well-planned removal process is key to maintaining healthy hair. If you’d rather have it done safely and correctly, you can book a free hair extension consultation to have your extensions professionally removed and your next steps mapped out with confidence.


